When you’re working with a map whether it’s for hiking, city planning, or classroom geography you need to know how distances on paper relate to real ground. That’s where scale factor application in cartography worksheet comes in: it’s the math that lets you convert measurements from a map to actual miles or meters. If your worksheet asks you to find the real-world distance between two towns shown 3 cm apart on a 1:50,000 map, you’re applying scale factor. It’s not abstract theory it’s what keeps navigation accurate and map-based decisions reliable.
What does “scale factor application in cartography” actually mean?
In cartography, scale factor isn’t just one number it’s the consistent ratio used to shrink or enlarge real terrain onto a flat surface. A scale of 1:24,000 means 1 unit on the map equals 24,000 of the same units on the ground. Applying it means multiplying or dividing measurements using that ratio. On a worksheet, that usually looks like: “A river is 7.2 cm long on a 1:100,000 map. How long is it in kilometers?” You multiply 7.2 cm × 100,000 = 720,000 cm = 7.2 km. No guesswork. Just clear, repeatable math tied directly to map reading.
When do students and early-career cartographers use this worksheet?
This type of worksheet shows up when learners move past labeling map features and start interpreting spatial relationships. Teachers assign it after introducing map scales but before tackling projection distortions. Surveying interns use similar exercises to double-check field data against base maps. It also appears in GIS prep knowing how to verify scale integrity helps spot errors in digitized layers. You’ll see it most often in high school geography, introductory geospatial courses, and land-use technician training not as a standalone skill, but as a foundation for measuring area, estimating travel time, or aligning GPS points with paper maps.
How is this different from scale factor worksheets for architects or engineers?
The core math is identical multiply or divide by the ratio but the context changes what matters. Architects focus on precise room dimensions and material takeoffs; their worksheets often include fractional inches and tolerances under 1 mm. Engineers read blueprints where scale affects structural load assumptions. Cartography worksheets emphasize large-area consistency: a 1:250,000 map must keep scale stable across hundreds of square kilometers, even if the Earth’s curvature causes slight variation. That’s why cartography sheets sometimes include notes about standard parallels or projection types details rarely needed in an architect’s scale factor worksheet or the engineering blueprint version.
What mistakes trip people up on these worksheets?
Unit mismatches are the top error: forgetting to convert cm to km, or mixing meters and feet without adjusting the scale ratio. Another common slip is misreading “1:50,000” as “1 cm = 50,000 m” instead of “1 cm = 50,000 cm” (which is 500 m). Some students invert the ratio using 50,000:1 instead of 1:50,000 especially when calculating map distance from real distance. And a few assume scale is uniform everywhere on the map, ignoring that conic or cylindrical projections stretch areas near edges. Worksheets that include graticule lines or mention “standard parallels” are hinting at that nuance.
What’s a practical way to check your work?
Pick one known distance like a road segment marked with mileage on the map legend and measure it with a ruler. Apply the scale factor. Does your result match the labeled distance? If not, recheck units and ratio direction. Also, sketch a quick unit ladder: cm → m → km, writing each conversion step. This catches skipped zeros fast. For digital workflows, try entering your calculation into a simple spreadsheet with locked scale factor cells then change the map measurement and watch the real-world output update automatically.
Where should you go next?
If you’ve just finished a cartography scale factor worksheet and want more practice with real terrain examples, try the dedicated cartography worksheet with topographic map excerpts and elevation-based scaling tasks. It includes U.S. Geological Survey quadrangle snippets and metric/imperial toggle notes. For comparison, the architect-focused version uses floor plans with door widths and stair risers, while the engineering sheet works with pipe diameters and beam spans. All three reinforce the same ratio logic just anchored to different real-world constraints.
Before moving on:
- Double-check whether your map scale is written as a ratio (1:24,000), verbal statement (“1 inch equals 1 mile”), or graphic bar scale each requires slightly different setup
- Write units at every step even in rough work to avoid unit confusion
- If the worksheet includes a note like “scale true along 45°N”, treat distances near that latitude as most accurate
- Use a fine-tip ruler, not a worn plastic one the difference of 0.2 mm can throw off a 1:100,000 calculation by 20 meters
 Designing Landscapes Using Scale Factor Calculations
 Scaling Engineering Designs with a Factor Worksheet
 Applying Scale Factors to Architectural Projects
 A Worksheet Template to Teach Scale Factor
 Applying the Scale Factor in Engineering Blueprint Design
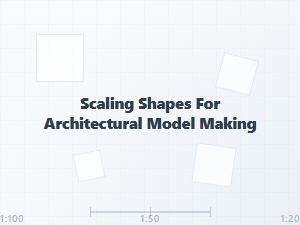 Scaling Geometric Shapes for Architectural Models